Overview
Managing a payee in the Revelator platform involves performing various actions to maintain accurate payment and account information. The Payee Details page provides a centralized location for managing transactions, assets, contracts, and profile information related to a specific payee.
The Payee Details page is divided into the following sections:
- Overview — displays the payee's balance, statement totals, and most recent releases.
- Assets — lists all associated assets, including title, artist name, label name, release date, and UPC.
- Contracts — shows the list of active and inactive contracts linked to the payee.
- Transactions — provides a history of payments and transactions made to the payee.
Prerequisites
Before you beginBefore following any of the guides below, make sure the following conditions are met:
|
How-to guides
Edit a payee's profile
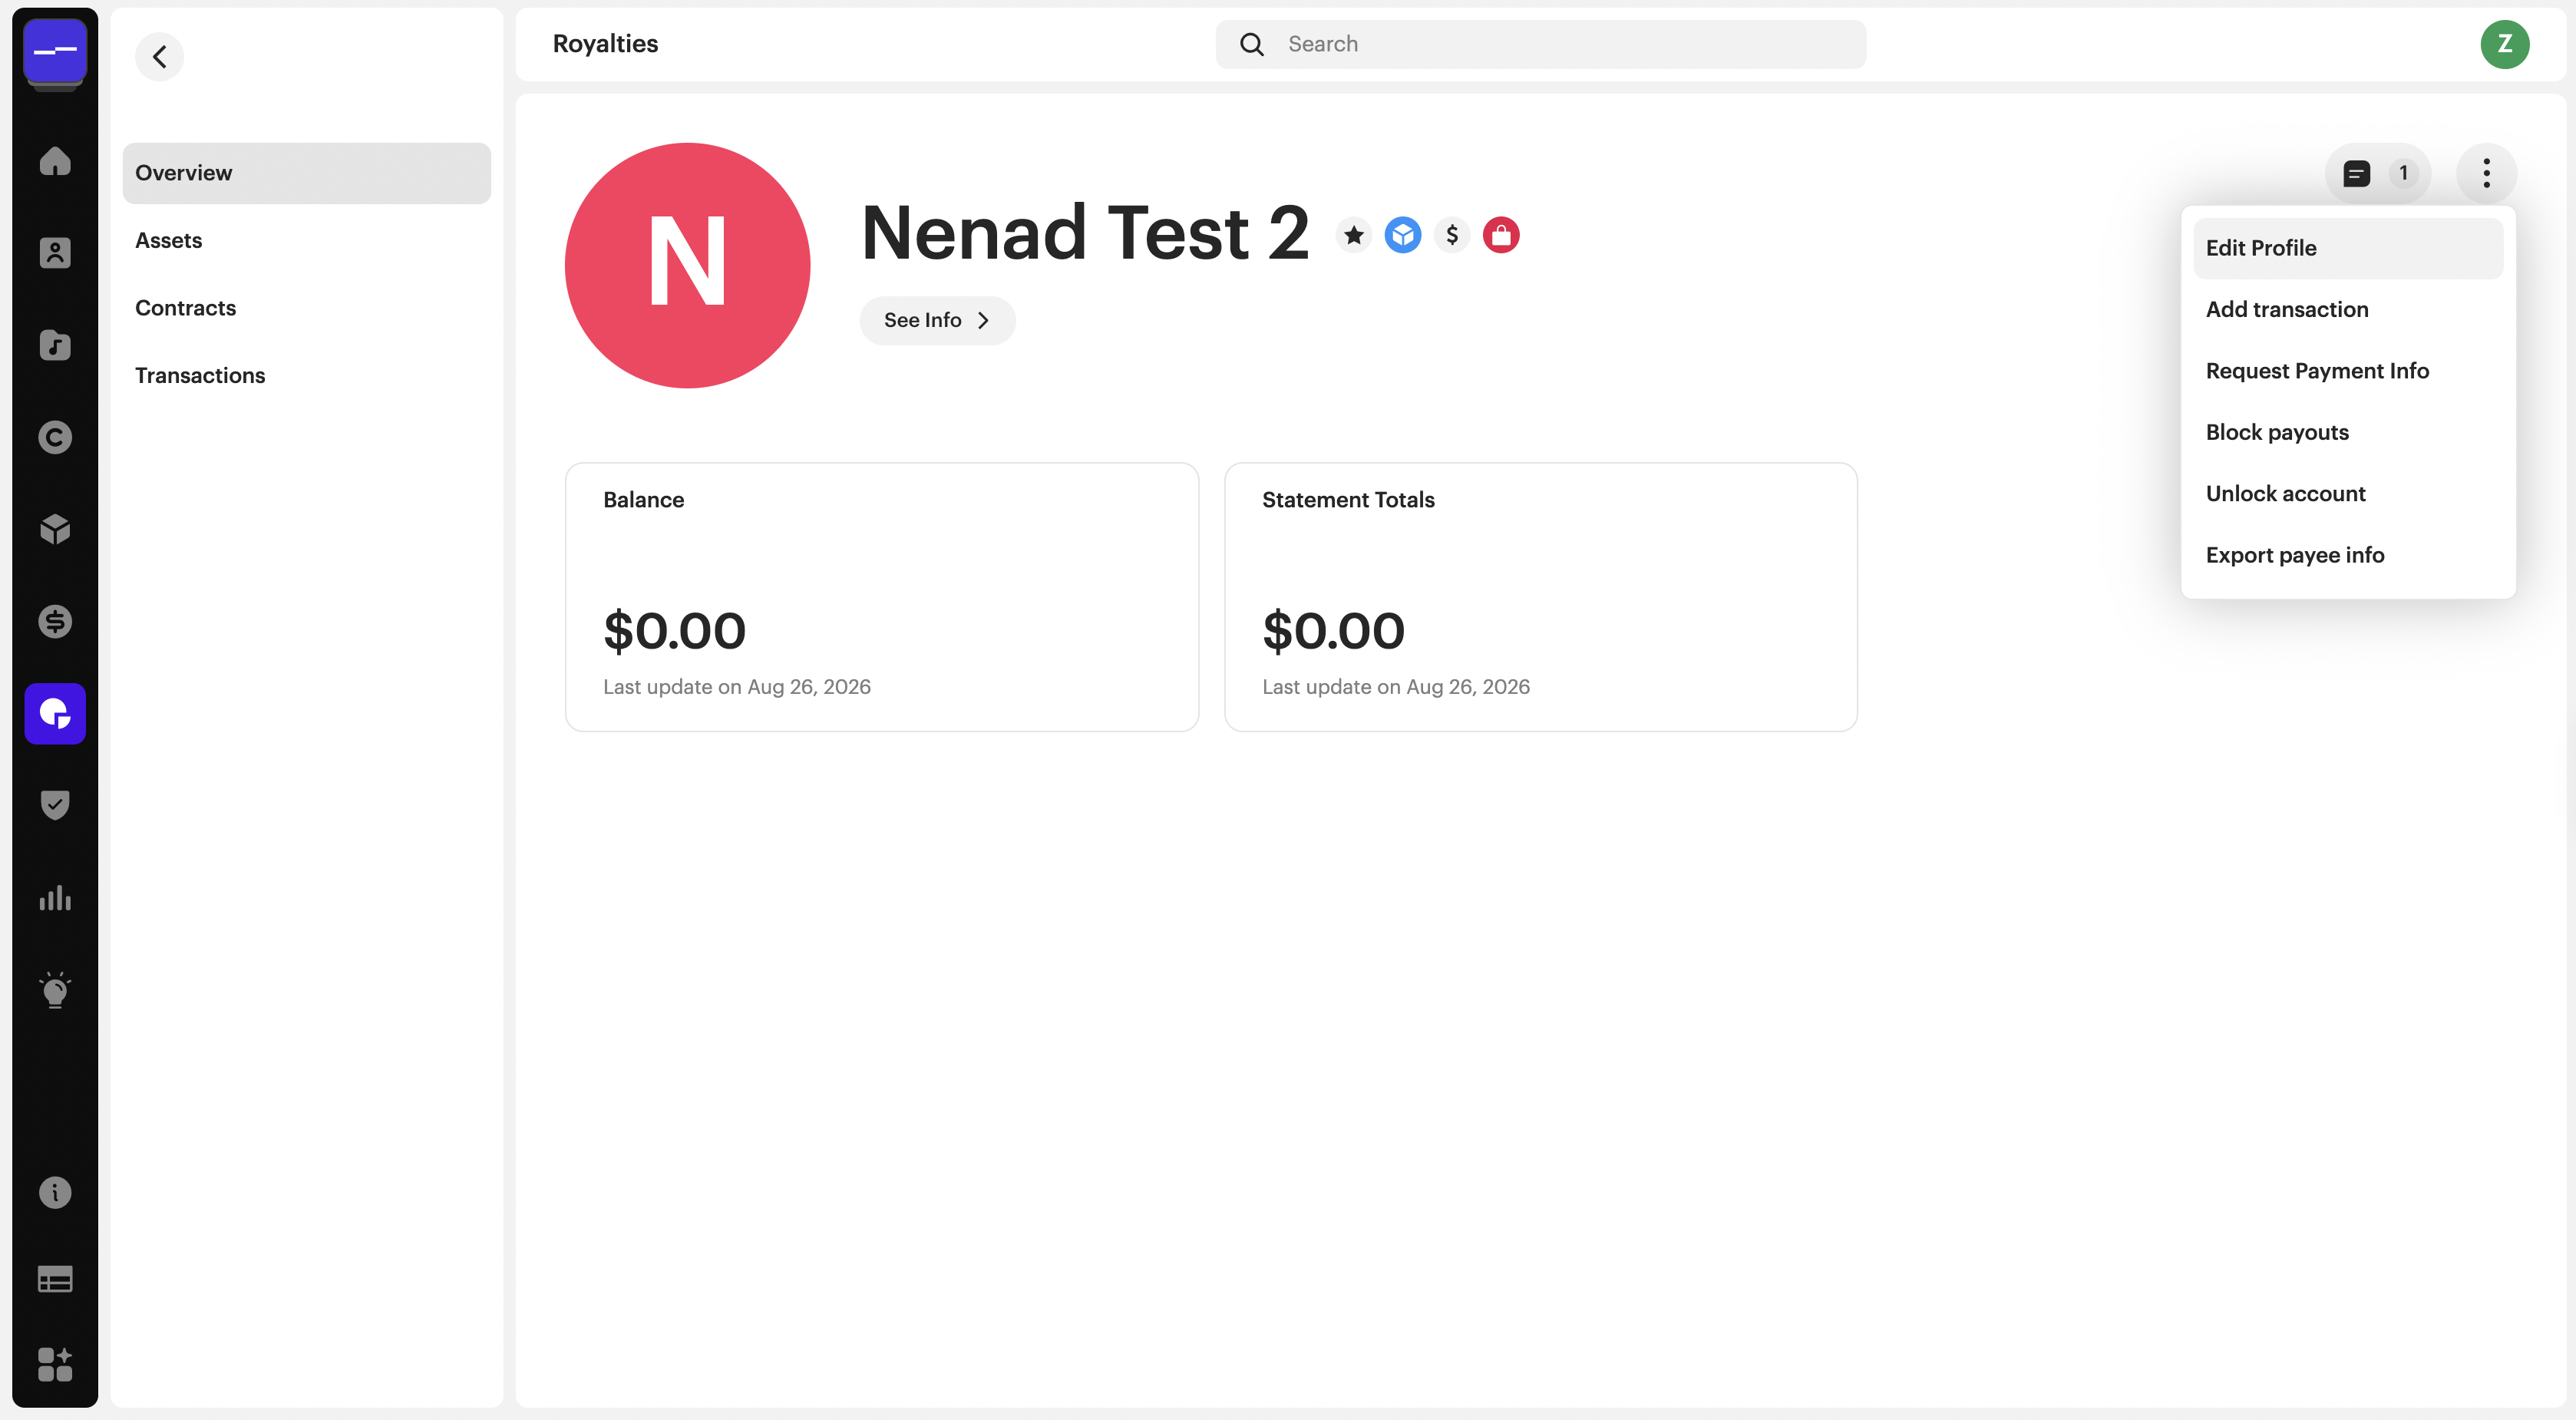
- Open any Payee Details page and click the options menu (
 ) to open the options menu, and select Edit Profile.
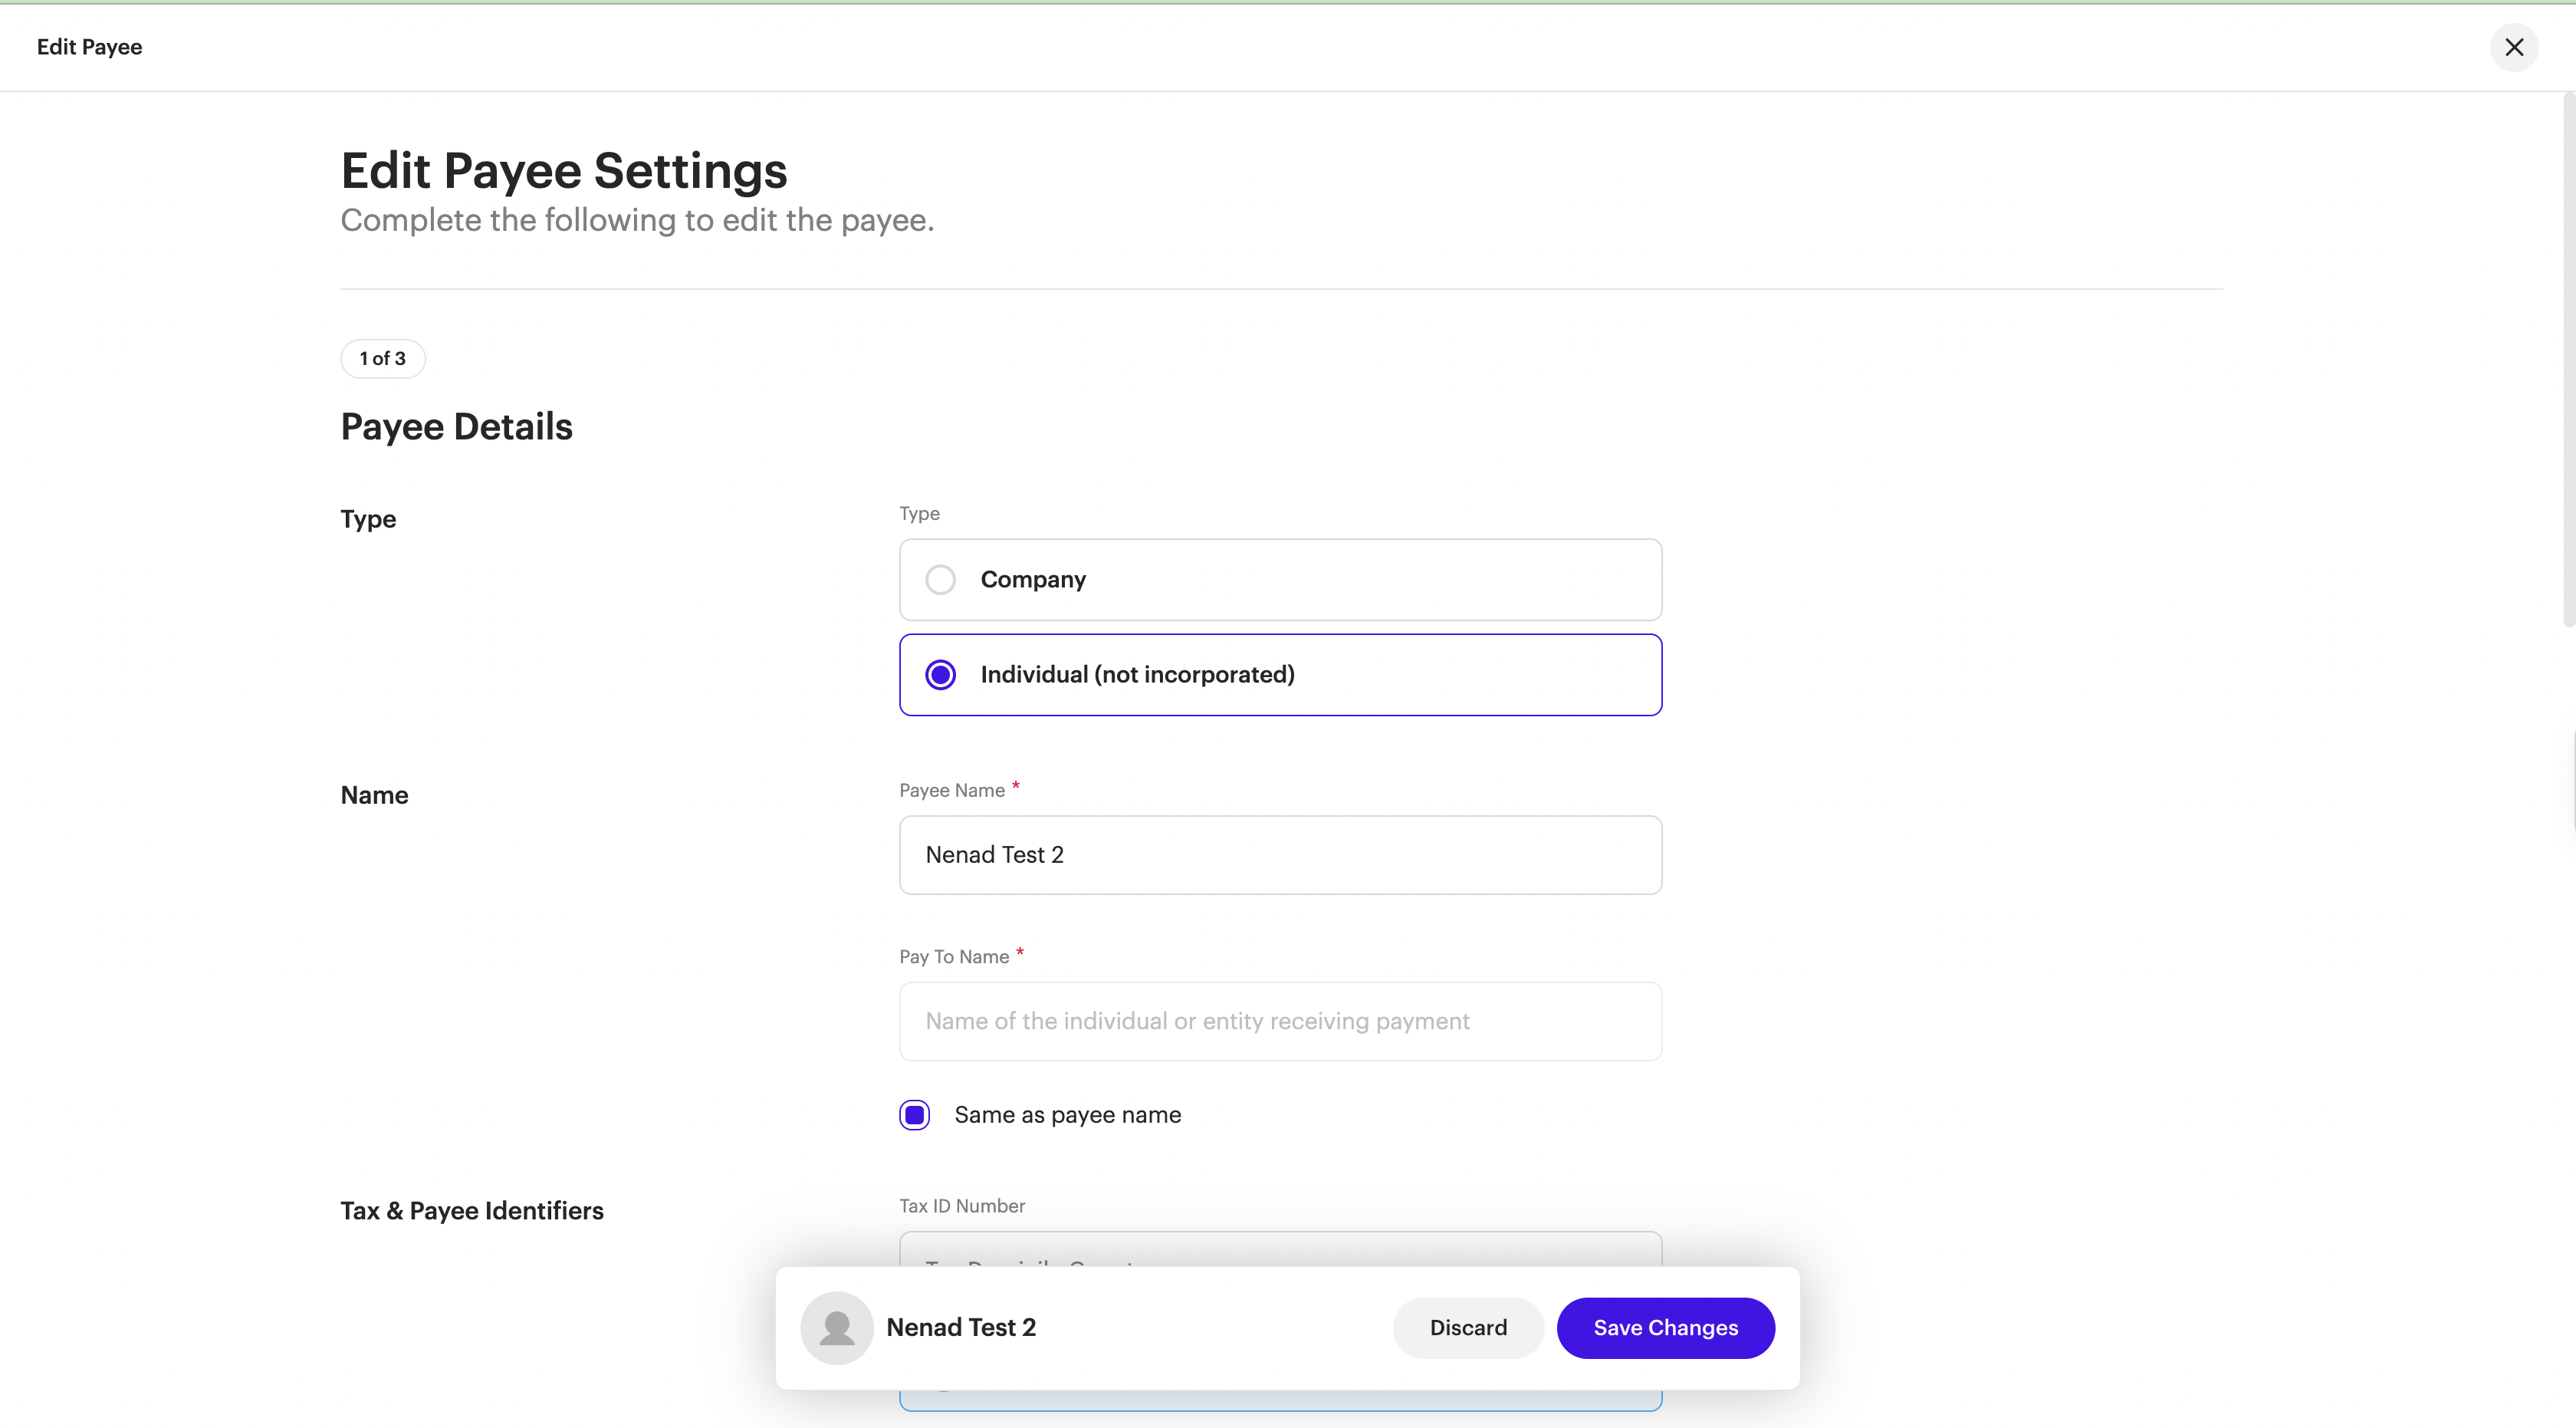
- This opens a new page where you can update a payee's details, including their tax IDs, payment information, email, statement currency, and portal access.
- Once changes are made, click Save Changes to save any changes you have made.
| Note Payees can also be edited from within contracts. When adding a payee split %, click Edit Payee Details. |
Request payment information
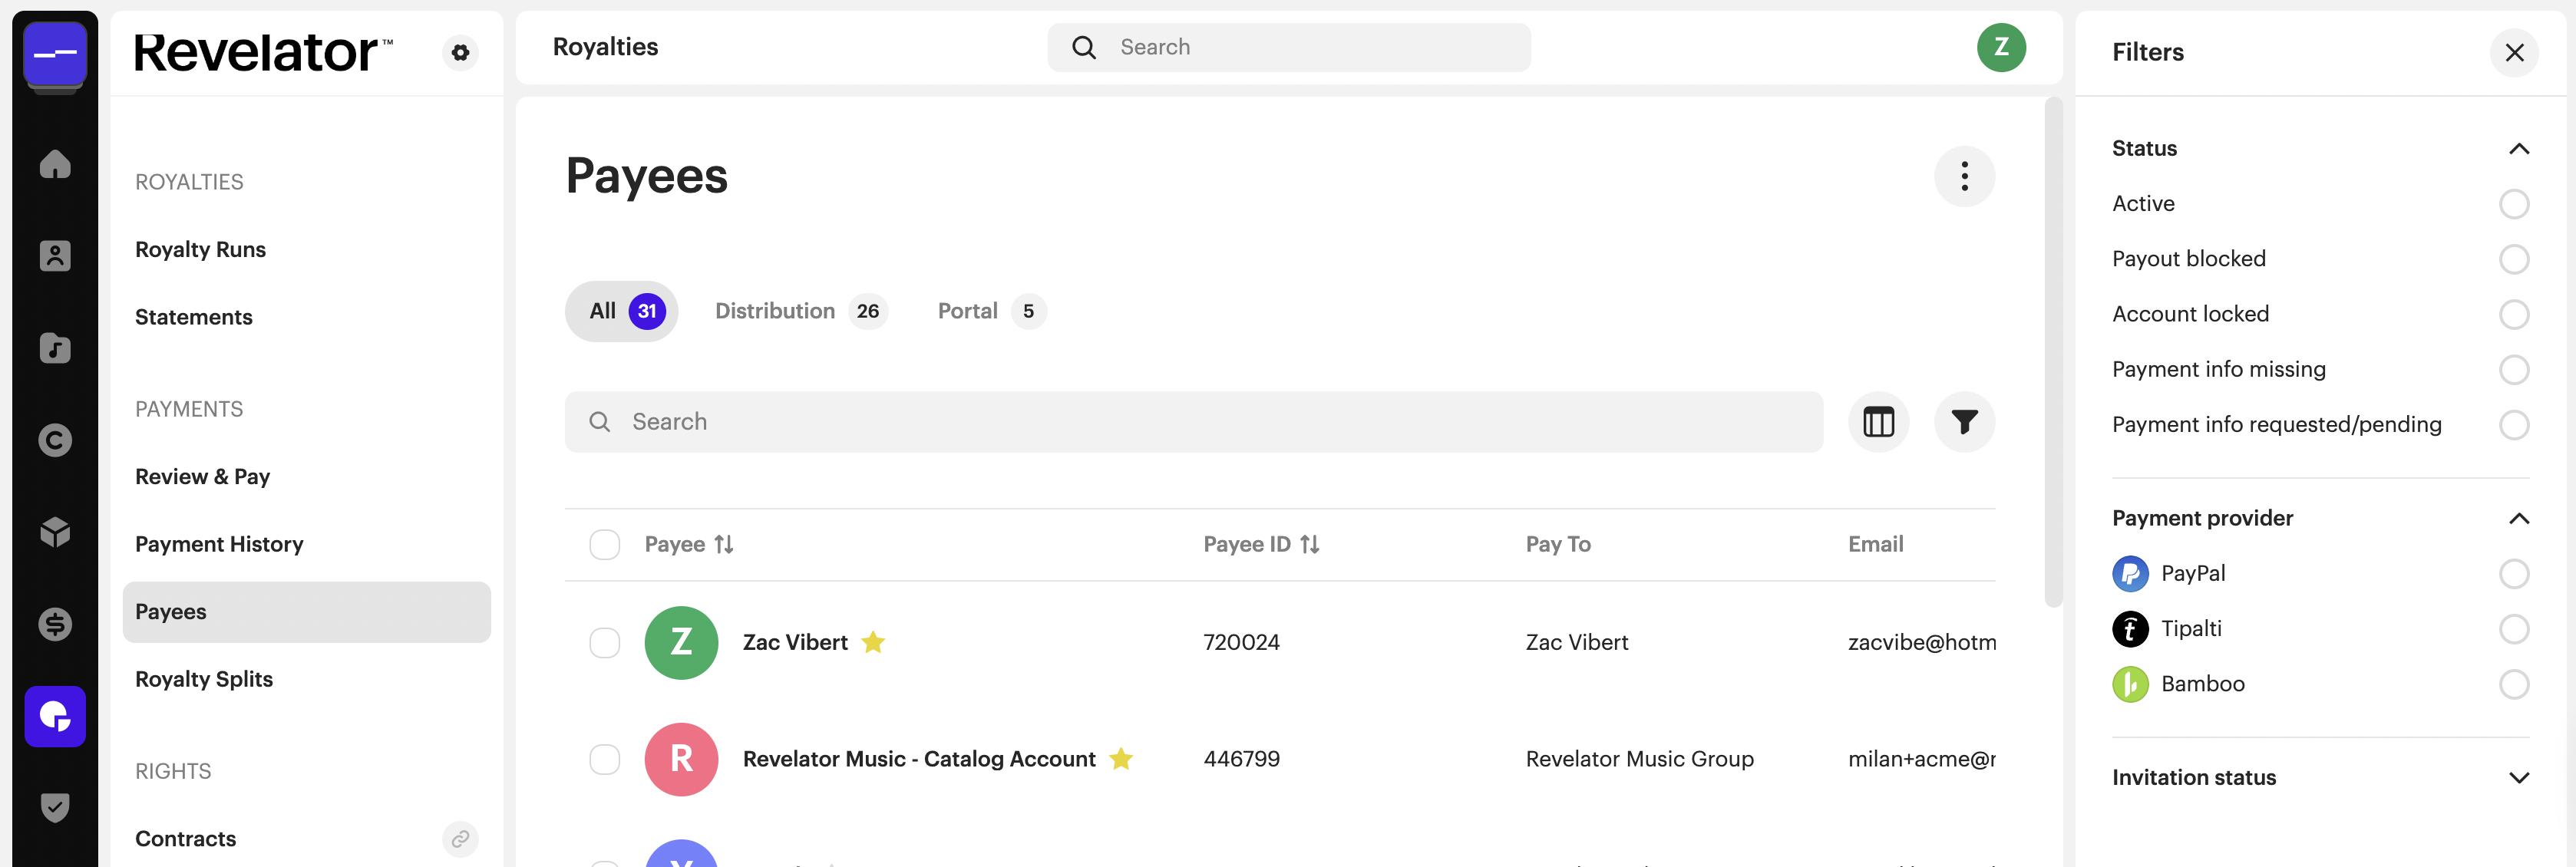
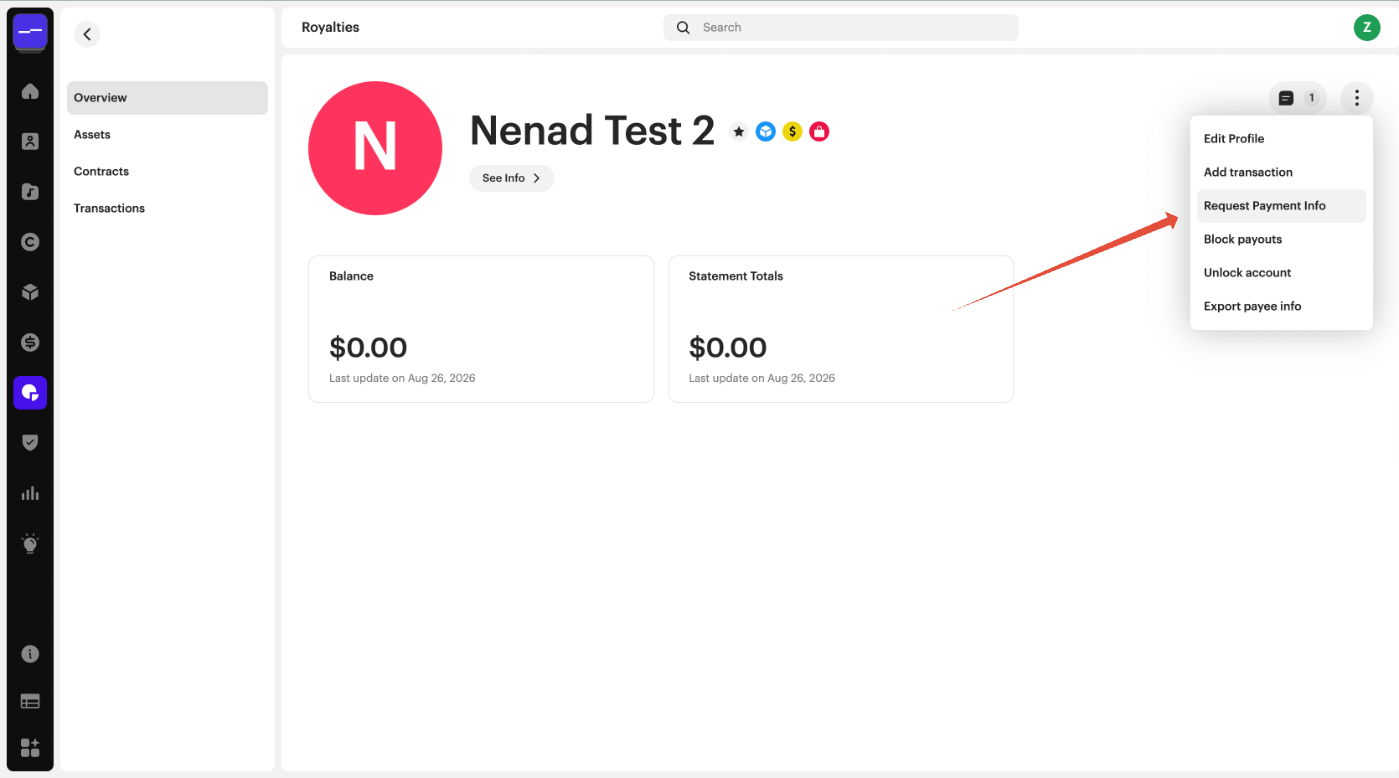
- From your list of payees, click the options menu (
 ) to open the options menu and select Request Payment Info.
 - This sends an email to the payee, requesting them to update their payment preferences.
| Tip This can also be done by selecting multiple payees and clicking Options from the action bar that appears, then selecting Request Payment Info. This sends an email to all selected payees requesting them to update their payment preferences. |
Add a transaction
- Open the Transactions tab within the Payee Details page and click Add Transaction, or click the options menu (
 ) to open the options menu and select Add Transaction.
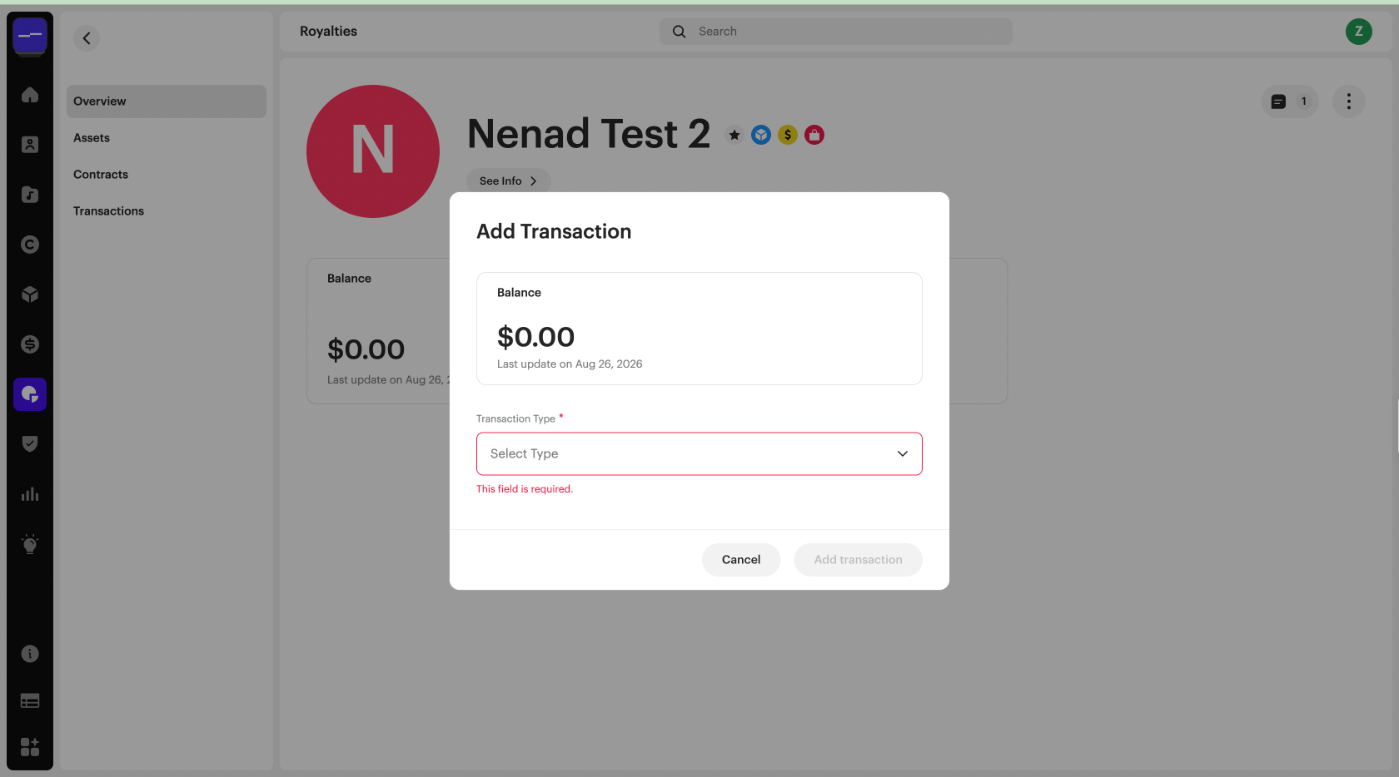
- A modal window appears for you to select the Transaction Type and complete the available fields.
| Transaction type | Definition |
|---|---|
| Adjustment | An adjustment allows you to adjust the payee's balance by a positive or negative value. |
| Advance | Add an advance that's been issued to the payee. |
| Expense | Record expenses for merch, distribution fees, marketing, fulfillment, etc. against the payee's balance when applicable. |
| Fraud | Used when recording fines related to fraudulent activity related to a payee. |
| Payment | For recording any other general payment that has been made to a payee. |
Different fields are available based on the Transaction Type selected. These include:
- Entry Amount
- Method (for Payment type)
- Entry Date
- External ID (if applicable)
- Vendor ID (if applicable)
- Expense Type (when adding expenses)
- Associated Contract (if applicable)
- Memo for additional notes
- When ready, click Add Transaction to save the transaction entry into your payee's transaction history, updating their balance.
Block payouts
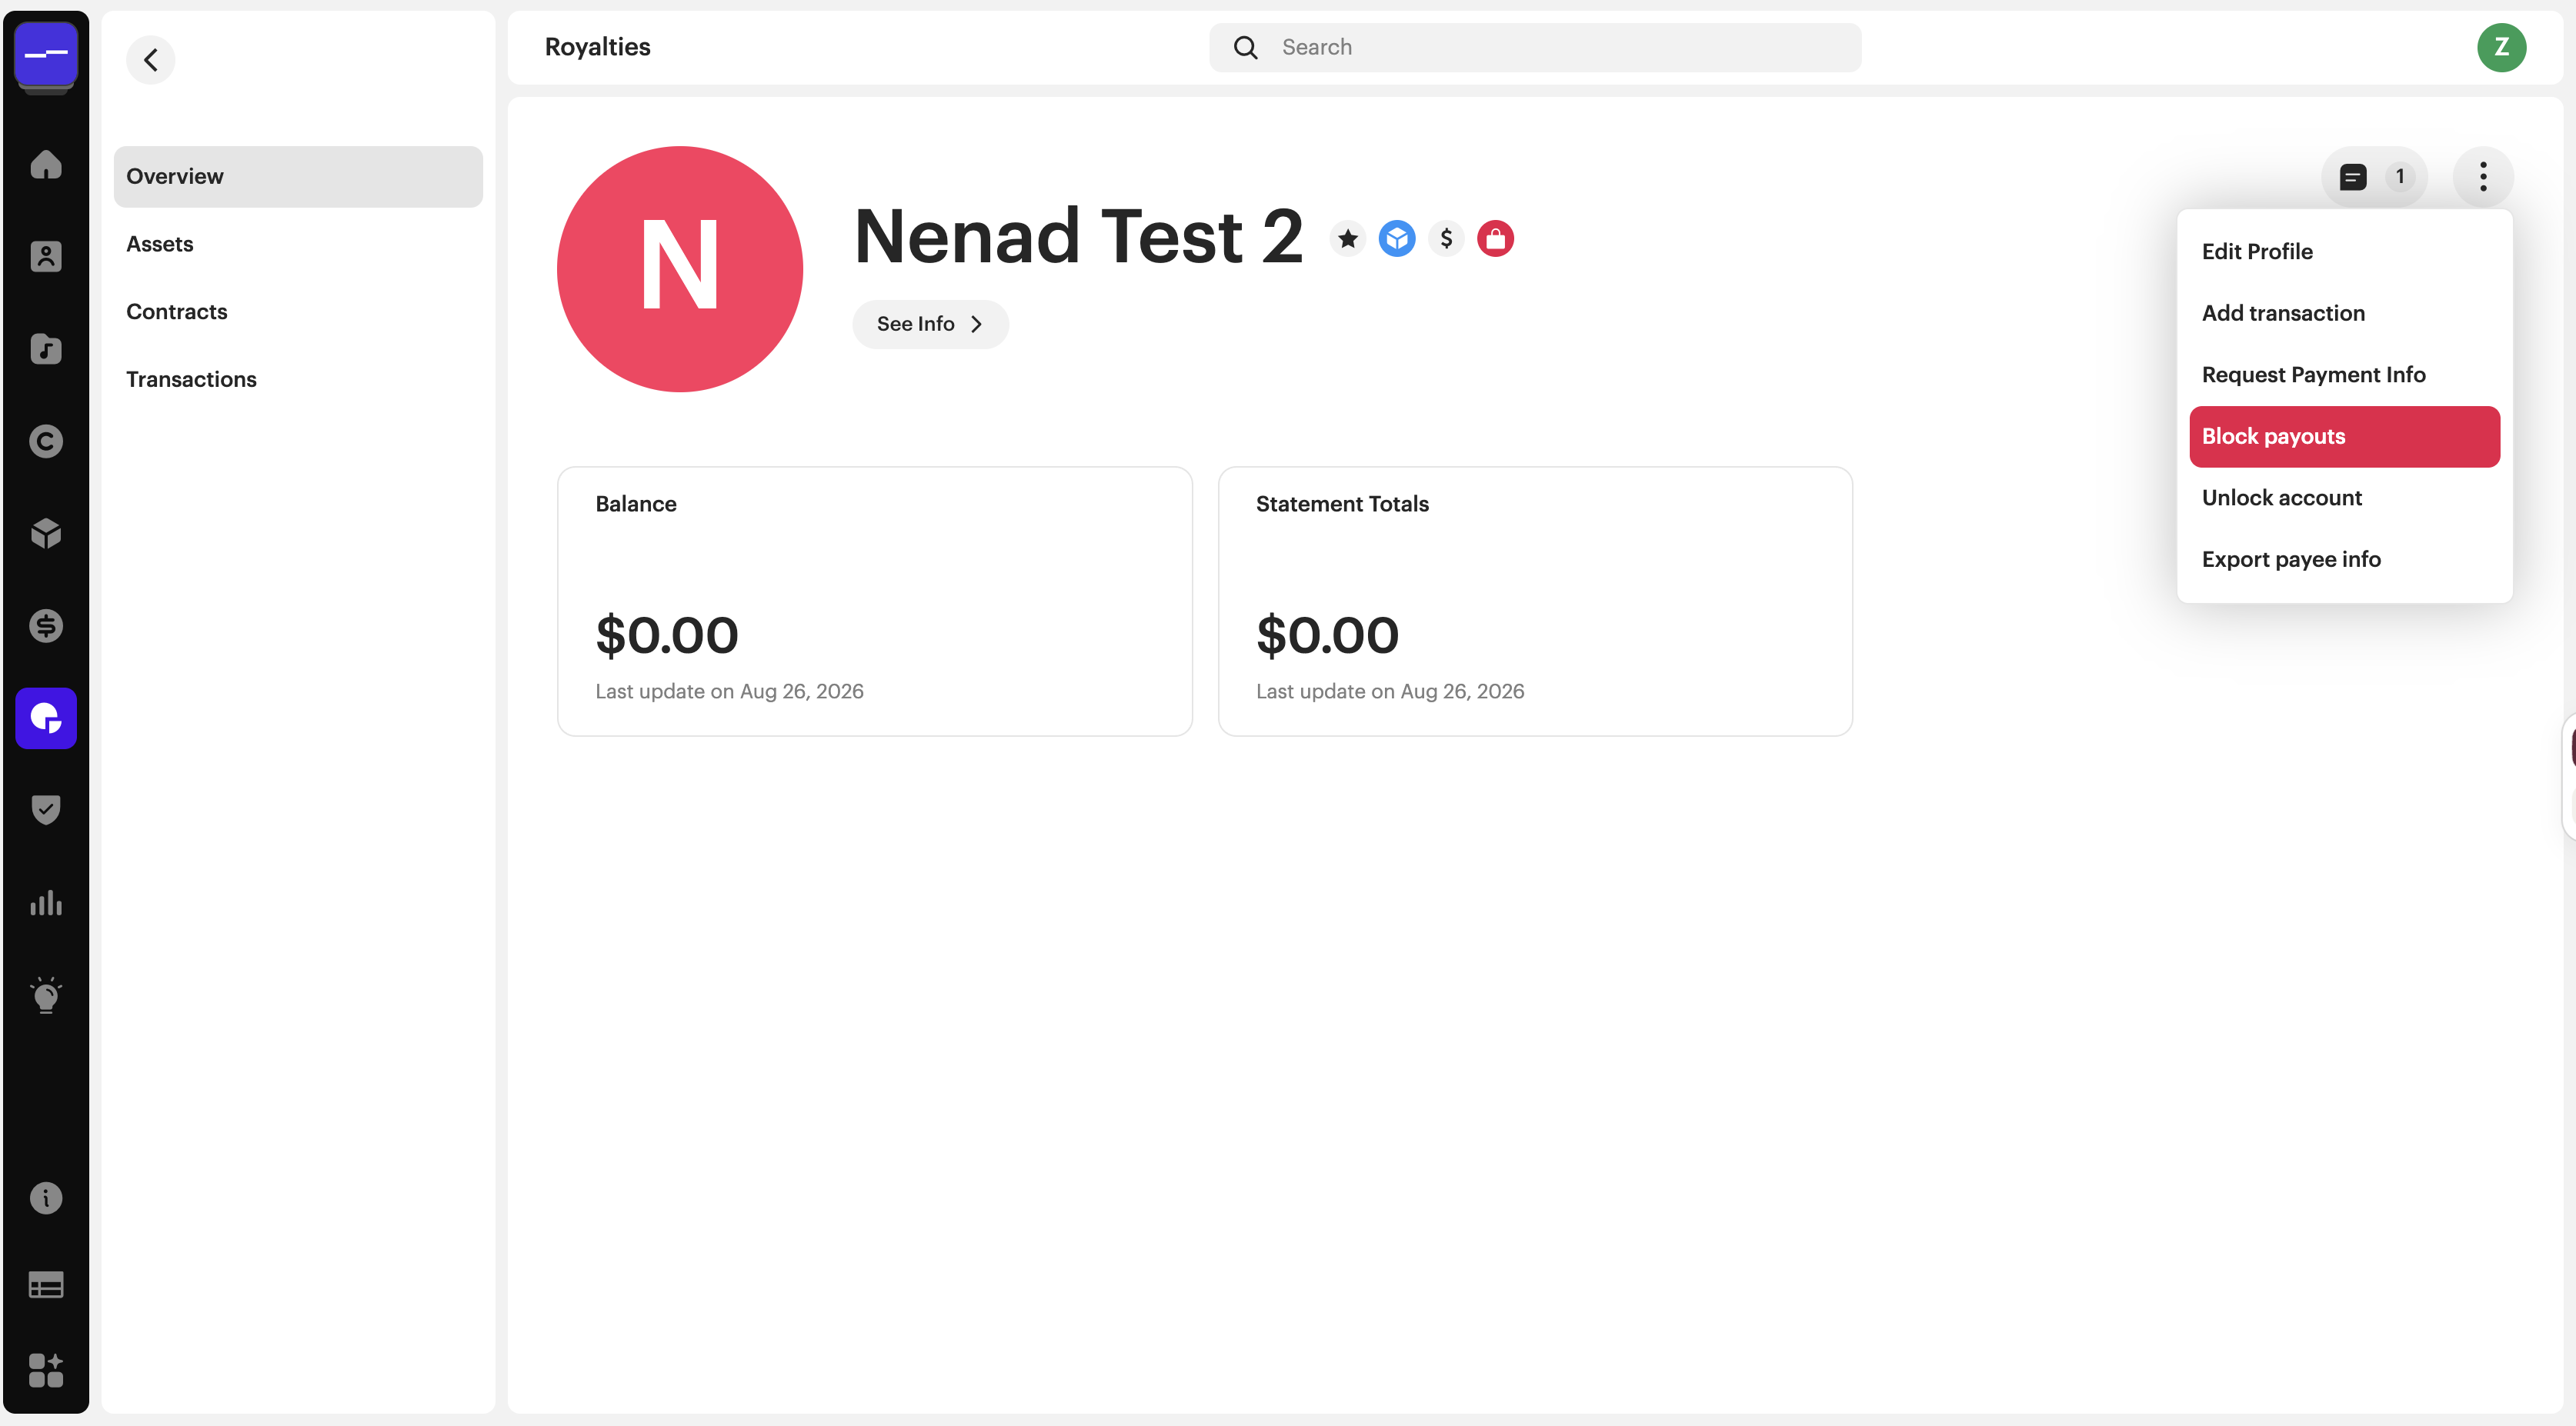
- Open any payee and click the options menu (
 ) to open the options menu, and select Block Payouts.
 - The payee's status is updated and they can no longer receive payments.
Unblock payouts
- Open any payee that has the status "Payouts Blocked" and click the options menu (
 ) to open the options menu, and select Unblock Payouts.
 - The payee's status is updated and they can receive payments again.
| Note This can be performed in batch by selecting multiple payees and opening the Options menu from the action bar that appears. |
Export payee details
You can export your payee information to a CSV file to review or manage it outside of Revelator. For the full walkthrough, see How to export your payees' details.
Troubleshooting and tips
- If the payee's balance shows as zero, verify the Transactions tab to check for recent payments or pending actions.
- Remember to use Filters to locate payees with specific statuses or payment providers, so you can perform batch actions.
| Need help? Contact support if you need assistance. |
Related articles
Was this article helpful?
That’s Great!
Thank you for your feedback
Sorry! We couldn't be helpful
Thank you for your feedback
Feedback sent
We appreciate your effort and will try to fix the article