This article walks through creating a digital release from start to finish.
Note
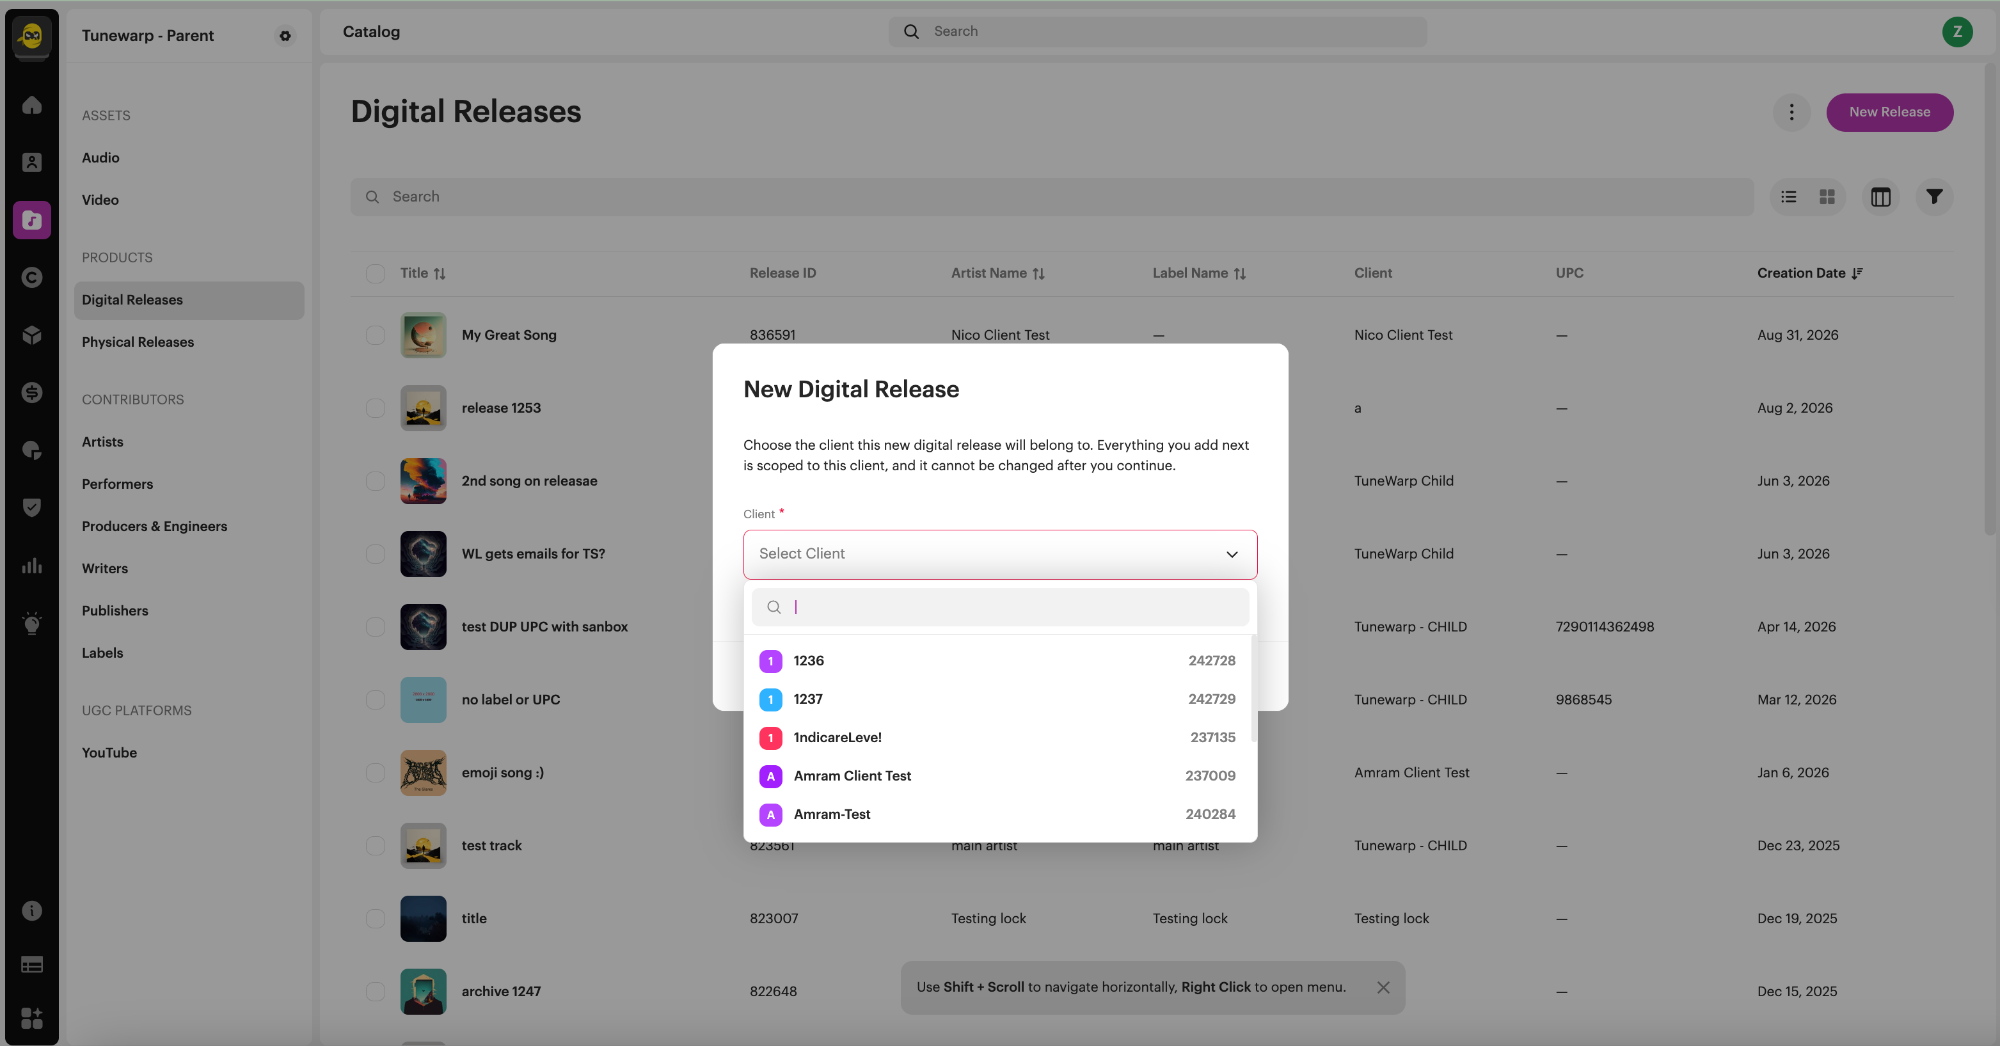
If you have an organization account that manages catalog for multiple clients, you can also create a release directly from your own account and assign it to a client, instead of working inside each client's account. The steps are the same as below, with one addition: you choose which client the release belongs to as you start.
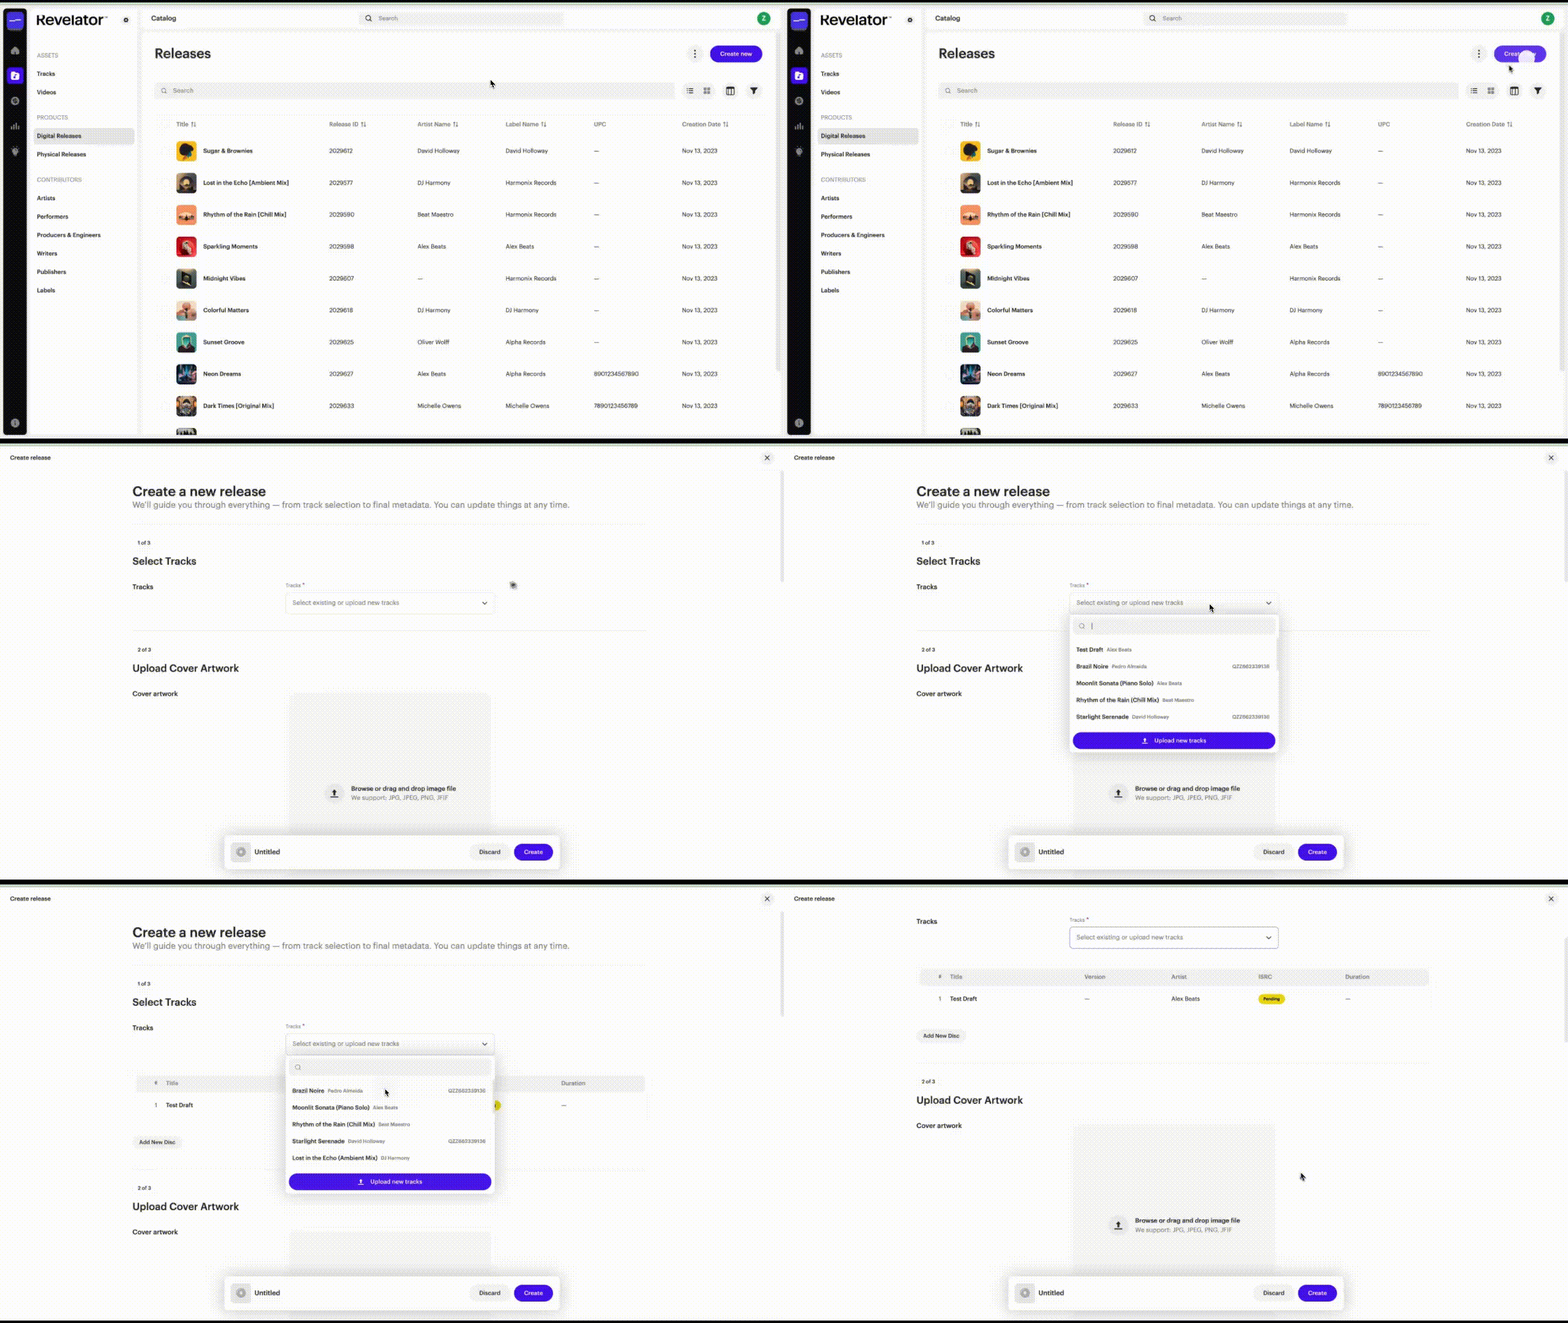
Step 1 of 3: Select Tracks
- Go to Catalog → Digital Releases and click Create New.
- Select existing tracks from your catalog, or upload new ones.
- Use Add New Disc if you're creating a multi-disc release.
- Drag and drop to set your track order.
Step 2 of 3: Upload Cover Artwork
- Click Choose Image and upload your cover art.
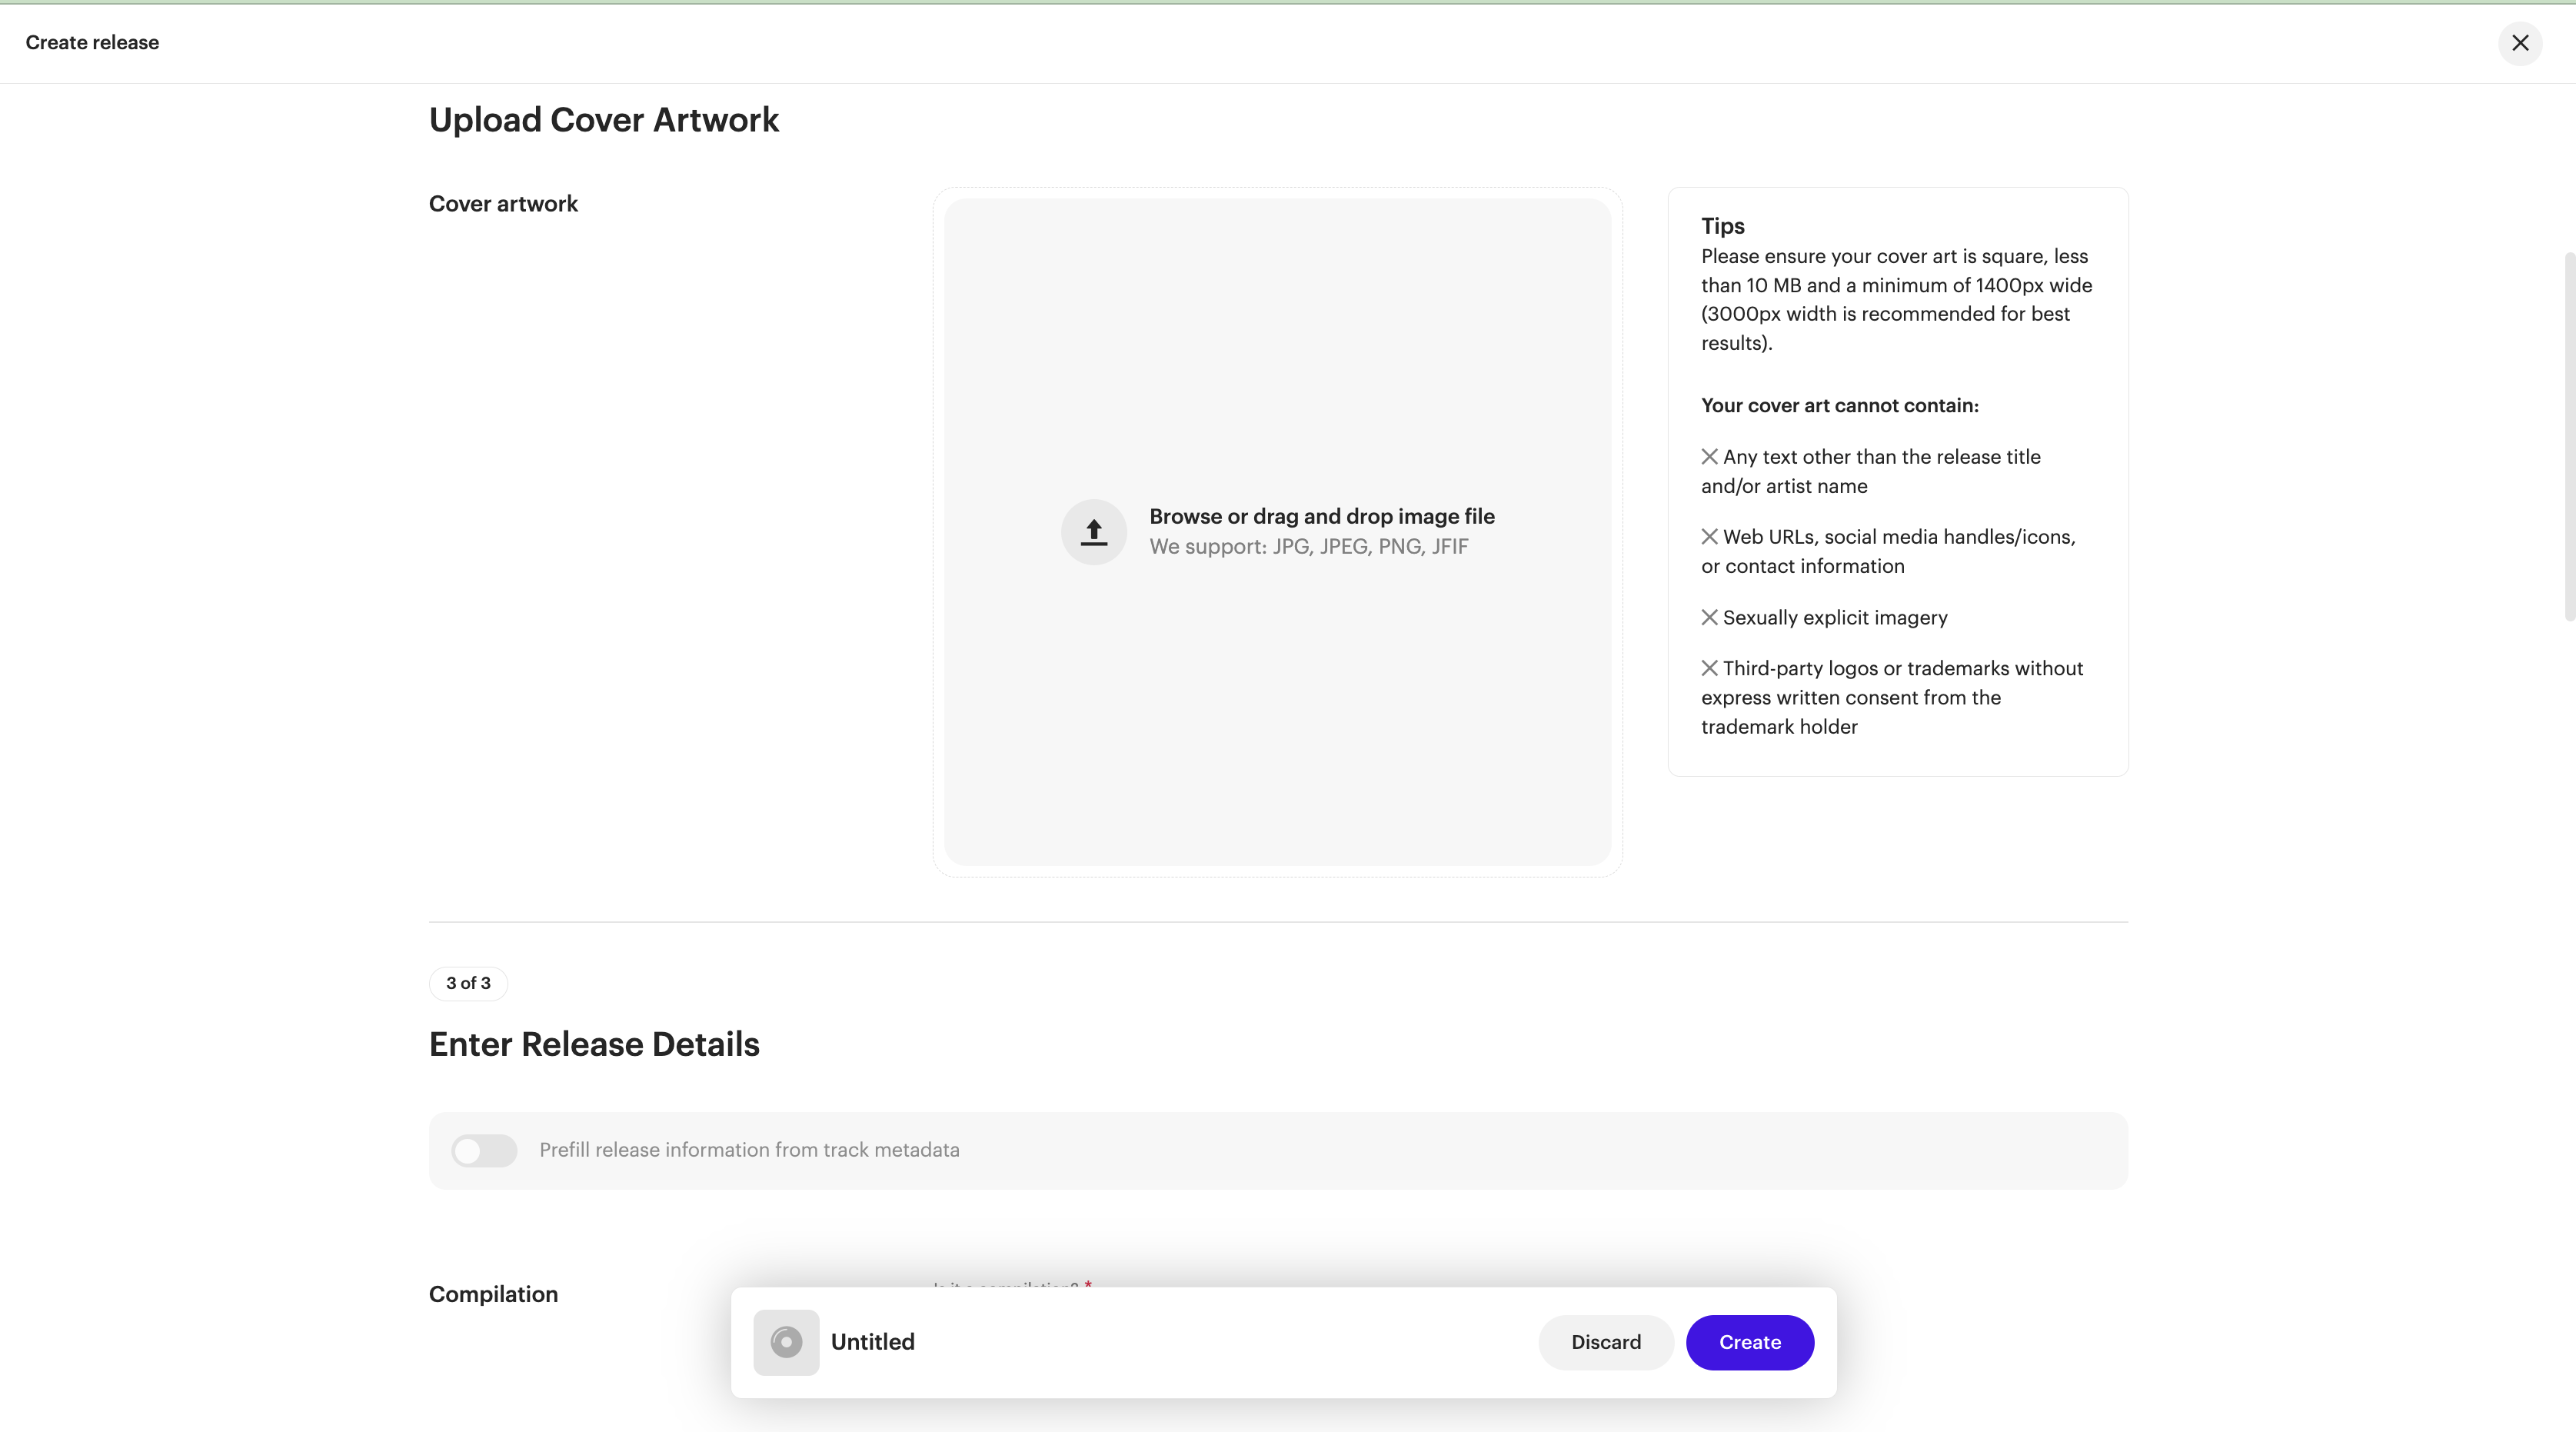
| Important Please ensure your cover art is square, less than 10 MB and a minimum of 1400px wide (3000px width is recommended for best results). |
WarningYour cover art cannot contain:
|
Step 3 of 3: Edit Release Details
- Toggle Prefill release information from track metadata on if your track metadata is already complete. This saves time by carrying details over automatically.
- Set Compilation: Yes or No.
- Choose your Metadata Language.
- Enter the release Title (and title version, if applicable).
- Add Contributors, Label, and Genres.
- UPC/EAN: enter an existing code, or leave blank to have one auto-generated.
- Catalog ID: leave this blank unless you're migrating from another distributor and need to preserve internal reference numbers (see Catalog ID: What It Is and When to Use It).
- Enter your (P) and (C) copyright lines.
Save and create
Click Create once all three steps are complete. If you try to close the wizard early, a confirmation dialog will ask if you want to discard your changes.
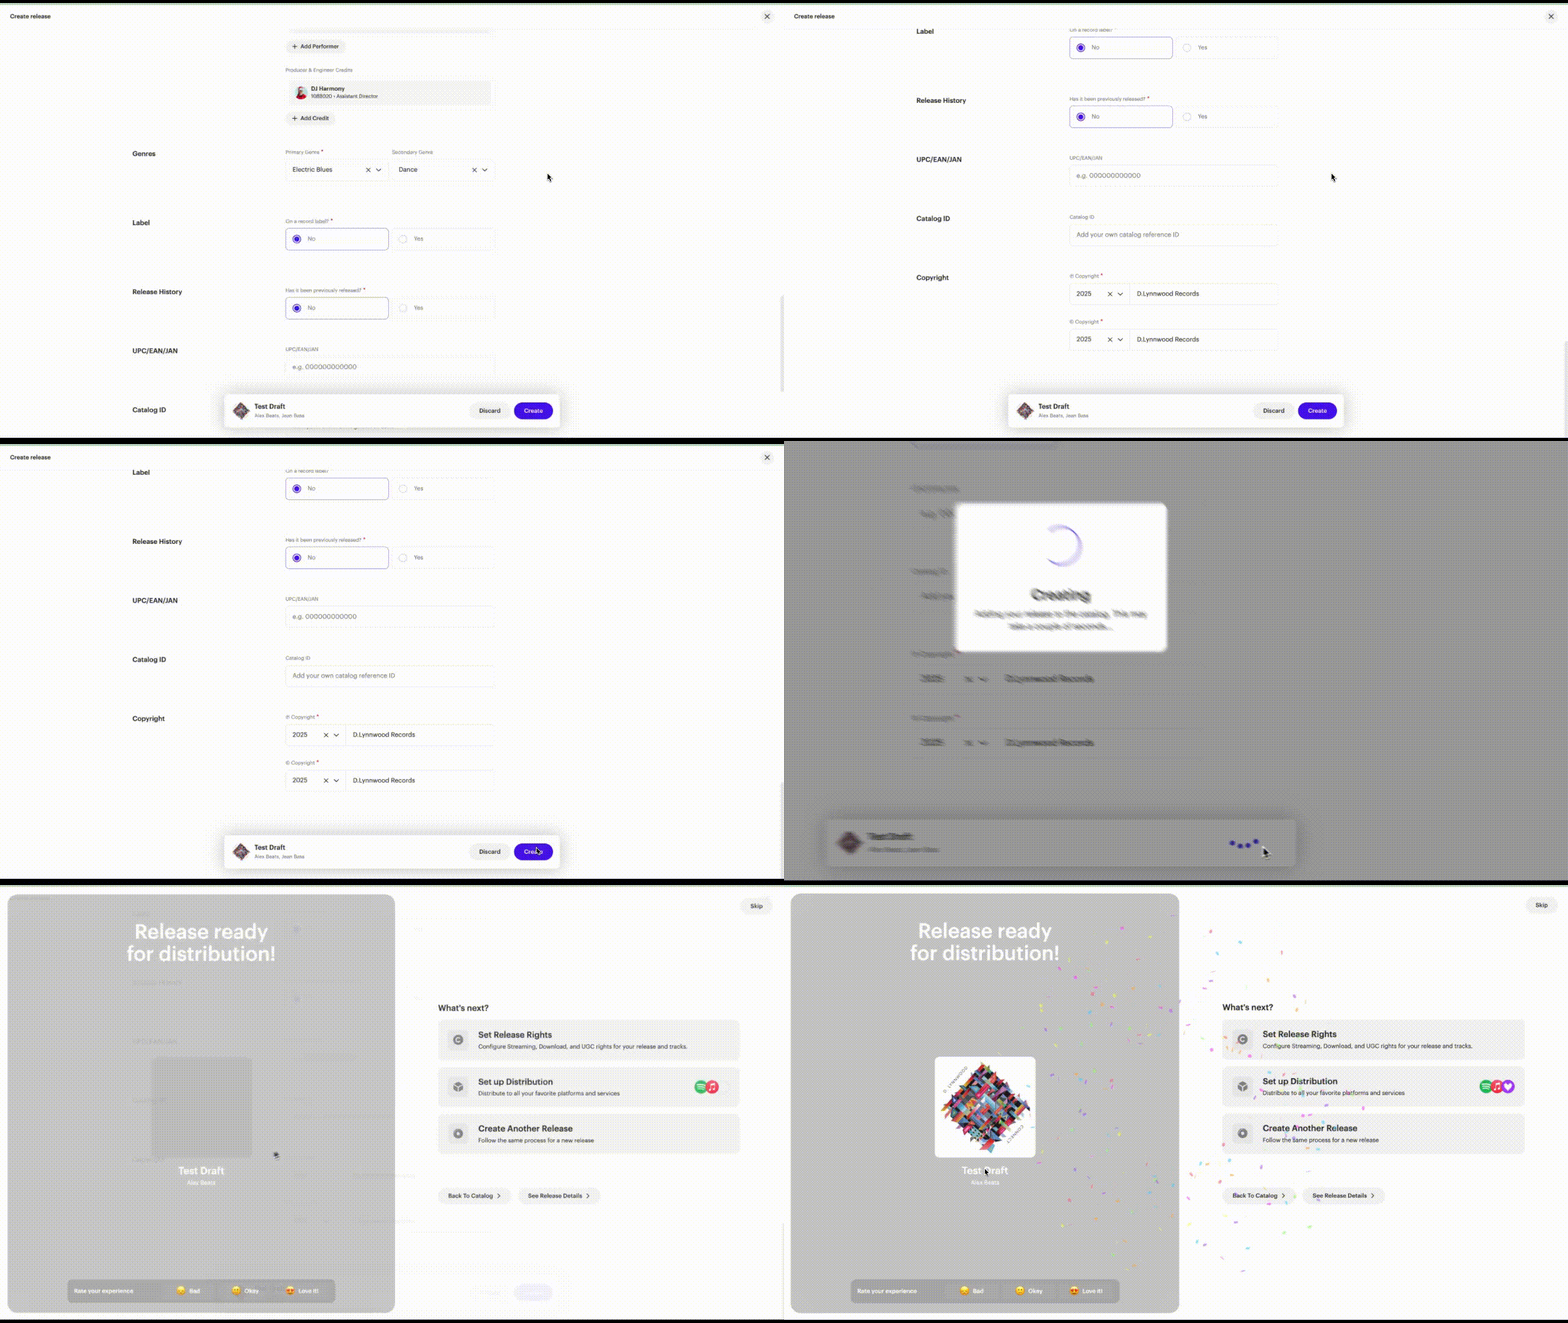
What happens next
Your release enters Not Distributed status until you submit it for distribution to your chosen stores and services.
Related articles
Was this article helpful?
That’s Great!
Thank you for your feedback
Sorry! We couldn't be helpful
Thank you for your feedback
Feedback sent
We appreciate your effort and will try to fix the article