You can pay your payees through an external payout provider by exporting their balances from Revelator, processing the payouts externally, and then recording those payments in Revelator so balances stay accurate.
How external payouts work
You pay balances, not individual statement amounts. The process has three parts:
- Export your payees and their balances from Revelator.
- Pay your payees through your external payout provider.
- Record the payments in Revelator, one at a time or in bulk.
Step 1: Export payee balances
You can download your payees and their balances from the Payees page.
- Go to Royalties → Payees.
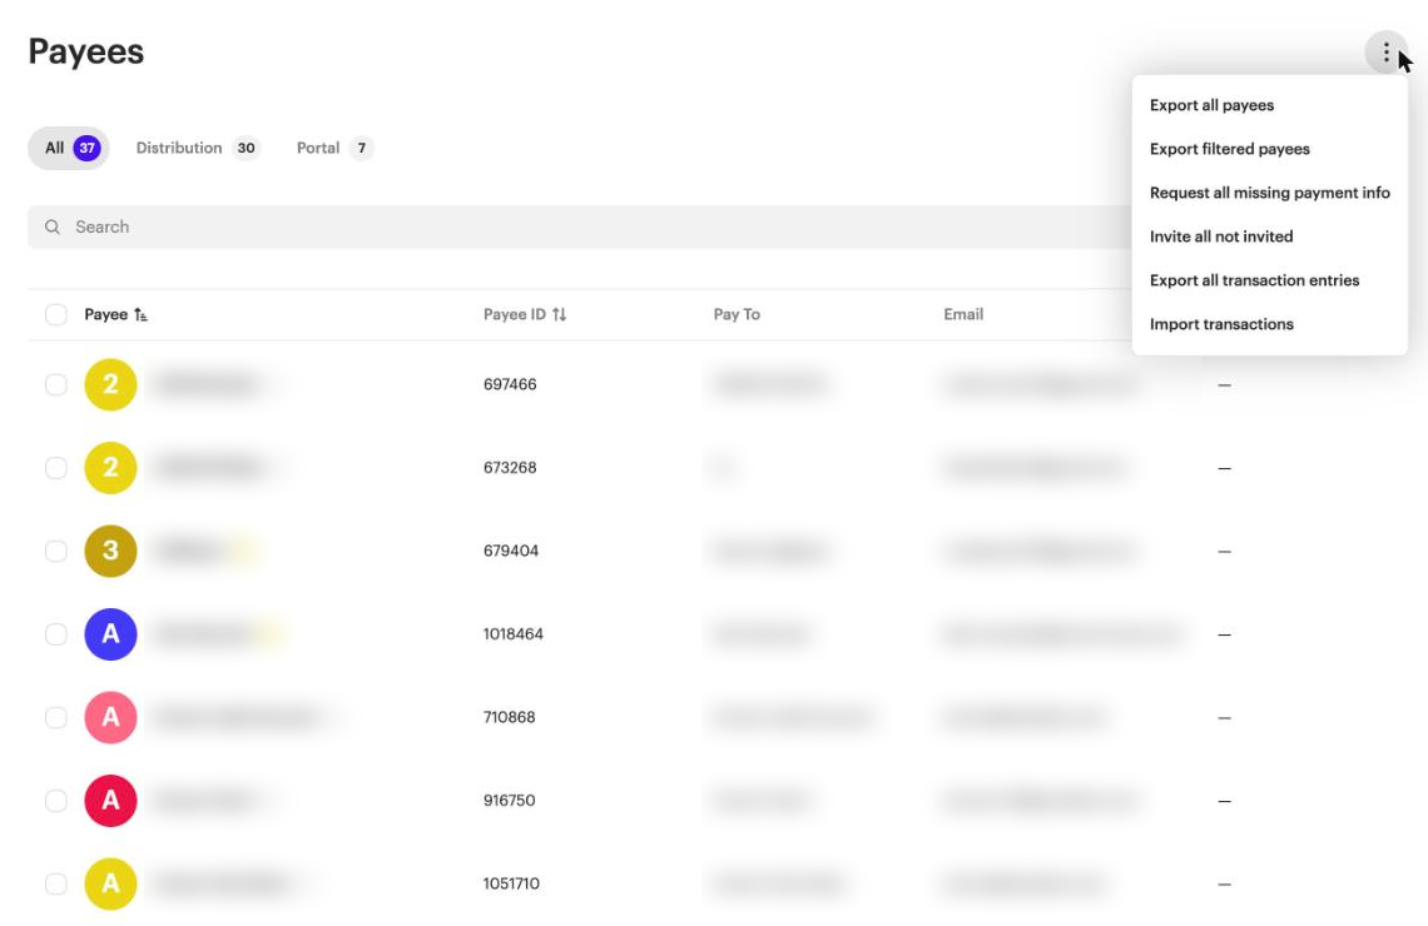
- Click the actions menu (⋮) at the top right of the page.
- Select Export all payees, or Export filtered payees to export only the payees that match your current search or filters.
Export a single payee
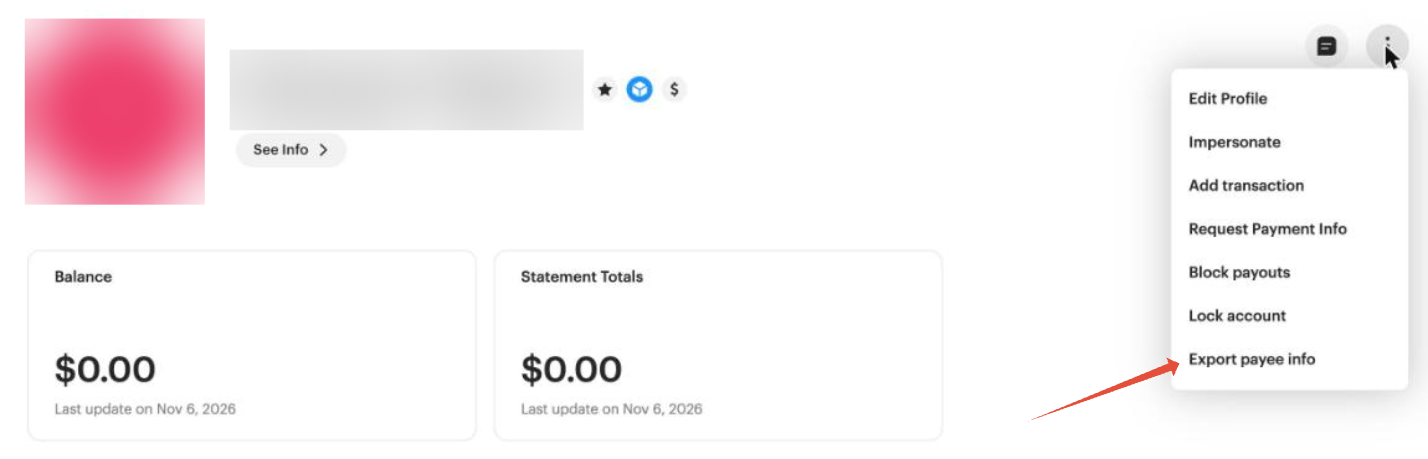
To export the details of one payee, open the payee, click the actions menu (⋮) and select Export payee info.
Step 2: Pay your payees externally
Use the exported data to process the payouts in your external payout provider.
Step 3: Record the payments in Revelator
| Important Once all your payments have been processed, record them in Revelator so your payees’ balances are updated. If you don’t, their balances won’t reflect the payments you made, and you’ll end up paying them more than they’re owed next time. |
Record every payment you make outside Revelator, either one at a time with Add transaction or in bulk with Import transactions.
Record a single payment
- Go to Royalties → Payees and open the payee.
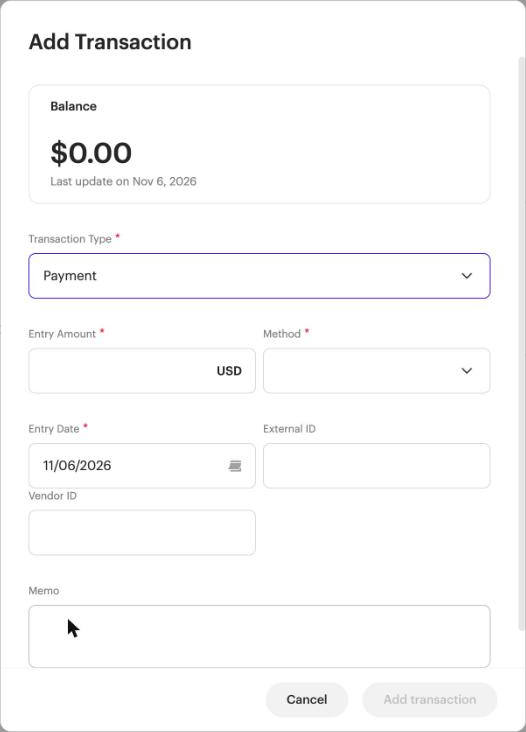
- Click the actions menu (⋮) and select Add transaction.
- In Transaction Type, select Payment.
- Fill in Entry Amount, Method and Entry Date. You can also add an External ID, Vendor ID and Memo.
- Click Add transaction.
| Tip You can also add a transaction from Royalties → Payment History: click the actions menu (⋮) and select Add transaction. |
Import payments in bulk
- Go to Royalties → Payment History or Royalties → Payees.
- Click the actions menu (⋮) and select Import transactions.
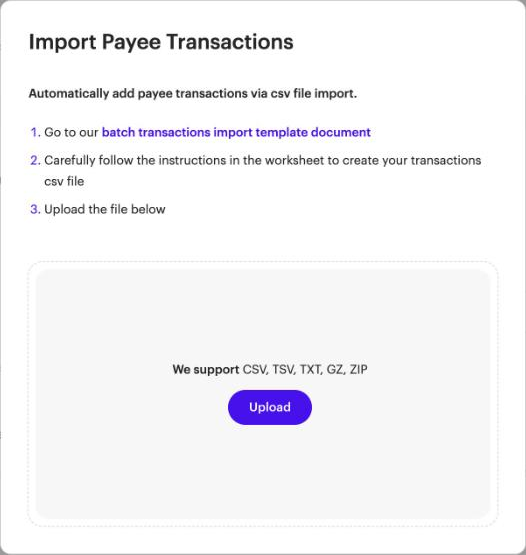
- In the Import Payee Transactions window, open the batch transactions import template document link.
- Make a copy of the template (File → Make a copy) and fill in the Template tab.
- While on the Template tab, download it as a CSV file (File → Download → Comma-separated values).
- Back in the Import Payee Transactions window, click Upload and select your file.
Batch transactions import template
The Template tab has the following columns:
| Column | Required |
|---|---|
| Payee ID | Yes |
| Contract ID | Yes |
| Amount | Yes |
| Method | Yes |
| Transaction Date (YMD) | Yes |
| Currency Code | Yes |
| Reference # | Optional |
| Transaction Type | Yes |
| Note | Optional |
| Subject | Optional |
- The template also has INSTRUCTIONS and Examples tabs to help you fill it in.
- Some column headers are light blue. These have an important note: hover over the cell to read it.
- Don’t remove or edit the header row (row 1).
- We recommend filling out the template in Google Sheets. Problems may occur in Excel or other spreadsheet apps.
- The import accepts CSV, TSV, TXT, GZ and ZIP files.
| Note Balances are tracked per payee ID, not per contract. The Contract ID column doesn’t create a separate balance. |
Frequently asked questions
Do I pay individual statement amounts or balances?
Balances, not individual statement amounts.
What happens if I don’t record payments I made outside Revelator?
Your payees’ balances won’t reflect those payments, so you’ll end up paying them more than they’re owed next time.
Does the Contract ID column create a separate balance?
No. Balances are tracked per payee ID, not per contract.
Can my payees see notes I add to a transaction?
Yes. A payee can see a transaction’s note by hovering over it.
Related articles
Was this article helpful?
That’s Great!
Thank you for your feedback
Sorry! We couldn't be helpful
Thank you for your feedback
Feedback sent
We appreciate your effort and will try to fix the article